Rom nygma 1.3 (backup) adalah Costume rom yang bisa digunakan untuk Ainol novo 7 paladin dan speedup ice, rom ini di buat dari base Rom Official ainol 4.0.3 dan Rom Official speed up. penggabungan rom ini bertujuan agar sistem yang tertanam memiliki Seting Bahasa Indonesia, untuk mempermudah pengguna baru Ainol paladin menggunakan Tabletnya. ROM ini sedikit berbeda dengan ROM nygma versi sebelumnya karena ROM ini bukan lagi berbentuk "zip" seperti rom Sebelumnya tapi berbentuk file back up cwm hal ini dikarenakan file master rom nygma 1.3 tanpa sengaja terhapus(padahal udah fix 100% :'( ) . rom nygma 1.3(backup) cukup stabil digunakan dan memiliki beberapa kelebihan dibanding rom sebelumnya, diantaranya :
Include Bahasa Indonesia
Free Ads (untuk beberapa game dan Aplikasi) jd tidak perlu instal aplikasi adfree
Playstore Moding (menggunakan file play store modding dari forum XDA) diharapkan bisa download aplikasi lebih banyak.
Overclock 1.2ghz
dll.
Untuk Rom nygma kali ini cara penginstalan berbeda dengan versi sebelumnya, karena harus masuk ke menu backup dan restore di CWM. agar tidak membingunkan cara penginstalnya berikut langkah yang harus di ikuti.
1.Download file IDWSpassword: paladin atau 4shared
2. buat folder baru lalu extrak file menggunakan Winrar.
3. setelah extra maka akan tampak seperti ini.
cek isi folder untuk memeriksa kelengkapan file. Clockworkmod/backup/2012-06-21.04.07.28 ,jika file yang di extrak sudah lengkap akan terdapat file-file.sperti ini
4.Copykan Folder Clockworkmod ke Sdcard.
5.Matikan tablet dan masuk ke CWM Recovery dengan menekan tombol power dan volume up
6. Pilih opsi Wipe Data (gunakan tombol volume untuk memilih, tombol power untuk Enter)
7.pilih opsi wipe chace patitions pilih delete all data.
8. pilih advance dan wipe dalvik cache
9.pilih back up restore. Liat gambar
10. jika semua tahapn telah selesai silahkan restar tablet, dan Enjoy.
Review
NOTE: Disarankan sebelum menginstal Rom ini gunakan rom official 4.0.3 dahulu untuk mengindari bugs , jika ada masalah. di play store silahkan gunakan nygma super tweaks .
For those of you who want to install Ubuntu on your Android
smartphone or tablet device, here’s our universal guide on how to do it.
(This guide is based off my original guide at NexusOneHacks.net) *Note – This guide should work on most “rooted” Android smartphones/tablets with no further modification.
We will be running Ubuntu “chrooted” under Android OS, which just
means that we will be running a “virtual” Ubuntu OS that runs on top of
the Android OS. Your Android OS will work fully (e.g. your phone will
keep working normally) while the Ubuntu runs on top of it.
First of all, you should have your Android device “rooted” because you need root access to run Ubuntu off your Android.
Second, your Android OS must support loop devices. Most newer
Android smartphones/tablets come with this support so we can mount our
Ubuntu image as a loop device. If not, you will either have to build
your own kernel with support for loop devices or you can try an
aftermarket ROM for your phone as most aftermarket ROMs come with
support for it.
For example, G2 Phone and Nexus One both come with loop device
support so there’s no need for us to compile a new kernel for it but for
others, you may have to.
How do you know this? Just try installing Ubuntu and if it doesn’t
boot, your Android device needs a kernel with loop device support.
Otherwise you are fine.
How to Install Ubuntu on Android! (Windows)
First, download the following Ubuntu.zip file (from a preferred
mirror), unzip and copy over the whole ubuntu directory to the SD card
of your Android smartphone/tablet device:
(Turn USB storage ON then copy over the Ubuntu folder to the root directory of your SD card.)
(What it looks like after copied over to the SD Card)
1) Again, make sure you have your Android smartphone/tablet “rooted”!
2) You must have Android SDK installed or have access to adb.exe.
3) Make sure your Android phone/tablet is in debugging mode. Go to Settings->Applications->Development and make sure USB Debugging is checked ON.
4) Connect your Android device to your computer via USB cable and set the USB mode to “Just Charge”.
5) Your Android device should be recognized as “ADB Device” under Device Manager. If not, install appropriate drivers.
For all HTC Android smartphones/tablets (such as G2 Phone, Nexus One), you can download Windows drivers here:
HTC Windows 64-bit driver download – Click Here to Download Driver
HTC Windows 32-bit driver download – Click Here to Download Driver
6) Open up a command prompt by typing “cmd” under Start->Search programs and files.
7) Browse to your SDK directory where you installed the Android SDK: Then go into platform-tools directory:
9) Type “adb devices” to double-check your Android device is recognized.
In this example, I used an HTC G2 Phone, which shows up at
“HT09SR204261″. This is fine. However, if you get an empty device,
that means you didn’t install the drivers for your phone/tablet
correctly. (Go back to #5)
10) Type “adb shell” to enter the Android shell.
Then type “su” to enter super user mode, then type “cd /sdcard” and
“cd ubuntu” to enter the ubuntu directory in your SD card of your
Android device.
11) Next, type “sh ubuntu.sh” to run the script which will basically
get your Ubuntu image ready to run on your Android smartphone/tablet.
If you get error messages, don’t worry and keep going.
12) Type “bootubuntu” to enter Ubuntu. (Next time you enter Ubuntu, you just need to type “bootubuntu” from your /sdcard/ubuntu directory, no need to run ubuntu.sh again.
If you got “root@localhost” at this point, congratulations! This
means your Android OS comes with loop device support and Ubuntu is now
running “chrooted” on top of your Android OS!!!
However, if you failed at this point, your Android OS probably
doesn’t support loop devices, try installing another ROM or compiling
your own kernel with loop device support.
How to Install Programs on your Ubuntu!
Once you’ve got Ubuntu running on your Android device, it’s time to install some Ubuntu packages(or programs).
Type “apt-get update” to update, this is the first thing you will need to do before installing any new programs.
How to Install OpenSSH-server on your Android Ubuntu!
Type “apt-get install openssh-server” to install OpenSSH-server.
What is OpenSSH-server? If you want to connect to your Android Ubuntu
via an IP address (and SSH into it), you will want to do this.
How to Install TightVNCServer on your Android Ubuntu!
If you want to access the GUI of your Android Ubuntu, you can install
TightVNCServer, which allows you to access the Android Ubuntu via
Android VNC app on your Android smartphone/tablet or even access it
remotely from your desktop computer.
Type “apt-get install tightvncserver” to install.
How to Fix Language Issues
Above is after I connected to my Android Ubuntu via SSH2. Well, for
some reason my default language switched to German. To fix that, just
type “export LANG=en_US.UTF-8″:
How to Install LXDE!(optional)
Next, we will install LXDE (Lightweight X11 Desktop Environment).
Although we can use Ubuntu’s default GNOME (and trust me I love that),
LXDE takes up less memory so our GUI access will be faster.
If you like GNOME, you can skip this step though.
Type “apt-get install lxde”
Next, let’s setup xstartup file so that when TightVNCServer is started, the LXDE runs instead of GNOME:
Type “cat > /root/.vnc/xstartup”
Then type: cat > /root/.vnc/xstartup
#!/bin/sh
xrdb $HOME/.Xresources
xsetroot -solid grey
icewm &
lxsession Then hit Ctrl+D twice and enter to save the file.
How to Start TightVNCServer!
Next, let’s start the TightVNCServer and connect to it from our Android phone and my Windows 7 desktop:
Type “export USER=root” and “vncserver -geometry 1024×800″.
Here, you can change the resolution settings 1024×800 to the resolution of your liking.
Now your TightVNCServer is ready to accept any incoming connections
from your phone or computer. Just point to the correct IP address and
use port number 5901 to connect.
On your Android smartphone, just download the free app
“Android-VNC-Viewer” and set the IP address to “127.0.0.1″ and port
number 5901 to connect.
And you should be able to get into your Ubuntu like this:
You can also use desktop software like TightVNC Viewer and connect to your phone.
Do “ifconfig” to find out what your IP address is in your Android Ubuntu.
In this example, mine was connected to “192.168.1.131″.
Then connect to “192.168.1.131:5901″ on your TightVNC Viewer:
Here’s LXDE running on my desktop off my G2 Phone’s Ubuntu:
Troubleshooting
Ubuntu not running?
Try typing “cp” under Android shell and if you get an error message, it means you need to install Busybox. Install Busybox and try again.
Getting Following errors? Err http://ports.ubuntu.com karmic/main Packages
404 Not Found
Err http://ports.ubuntu.com karmic/universe Packages
404 Not Found
W: Failed to fetch http://ports.ubuntu.com/ubuntu-ports/dists/karmic/main/binary
-armel/Packages.gz 404 Not Found
W: Failed to fetch http://ports.ubuntu.com/ubuntu-ports/dists/karmic/universe/bi
nary-armel/Packages.gz 404 Not Found
E: Some index files failed to download, they have been ignored, or old ones used
instead.
Try:
cat > /etc/apt/sources.list
deb http://old-releases.ubuntu.com/ubuntu/ karmic main universe
Then hit Ctrl+D twice and Enter.
This will update the Ubuntu sources.
Final Thoughts
As said in the video, there will be a lot of improvements in the
speed of Android devices in the near future. This year, there will be a
slew of dual-core 1Ghz processor-equipped Android devices being
introduced. Which just means our Android Ubuntu will run faster and
faster.
This is the
paid version for the FREE Guide to downloading and installing Backtrack
within Android. It is recommended that you try the free version first to
make sure this method works on your device!
By Buying this version you get
All updates before free version
Download images from my fast FTP server (direct download) instead of
sourceforge (downloads will be up to around x10 faster, and when you
click the button in app it will start downloading instead of opening
sourceforge site)
New ‘one click boot feature’ which allows you to press a button in
the app to boot Backtrack, or use the included widget to launch
Backtrack instead of having to type out commands!
A good feeling of supporting the development of this app
+Much more in the future
!NOTE!
To use the one click boot you MUST have the terminal
app used in the install guide installed on your device. That is this app
here: https://market.android.com/details?id=jackpal.androidterm
If the app was included in your ROM uninstalled it then reinstall it on the market, if its included in the ROM IT WILL NOT WORK.
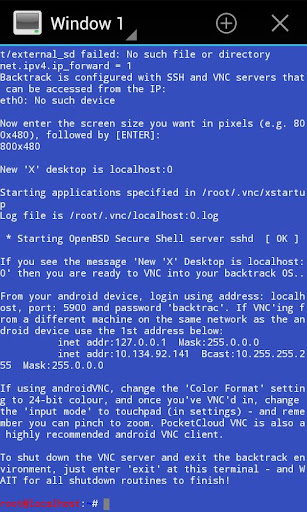
This app includes everything you need to install Backtrack within android and get it running on your device!
(This does not replace android on your device it just runs Backtrack ontop of android)
Requires:
Root
1GHZ processor (recommended)
512MB Ram (recommended)
Android 1.6 or higher
Kernel will loop device support (this is included in most custom ROM's)
SD card with at least 3.5GB of free space
Data connection on your device
What is this?
This is a customized Backtrack image optimized
for the ARM processor (the processor android runs on). This will allow
you to run a full Backtrack system within android (You can still make
calls, text, and use android without having to reboot your phone!).
Key Features:
User select screen size on boot
All the security testing software included in backtrack
All other software included in backtrack
Updated to newest software updates as of 1/1/12
Image cleaned up to give around 800MB free space
Download images from my fast FTP server!
One click boot feature which allows you to press a button in the app
to boot Backtrack or use the included widget to launch Backtrack
instead of having to typing commands
App provides a detailed instruction set on how to get Backtrack running
on your android device with all of the necessary files and custom
backtrack images. The images are 700MB to download and 3.5GB once
extracted
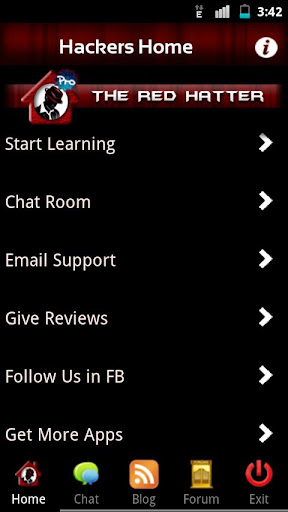
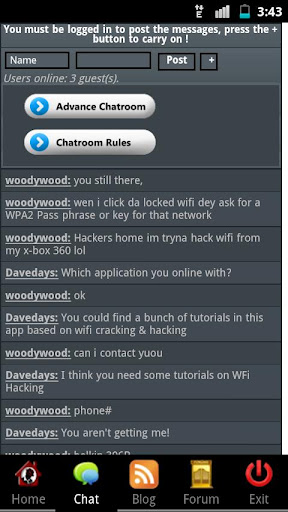
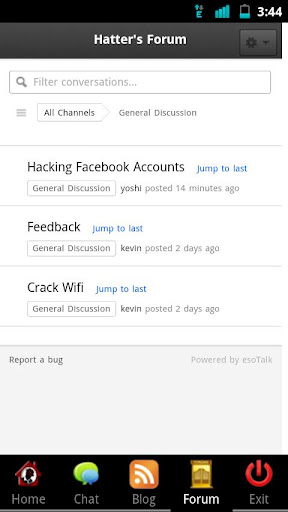
Hacker’s Home is the 1st android app ever in the Google Play Store which
includes tons of stuffs relating Hacking Computer, Wi-Fi, Website,
Facebook, Emails with step by step tutorials and with live chat
functionality which let you stay tuned with the hackers all around the
globe.
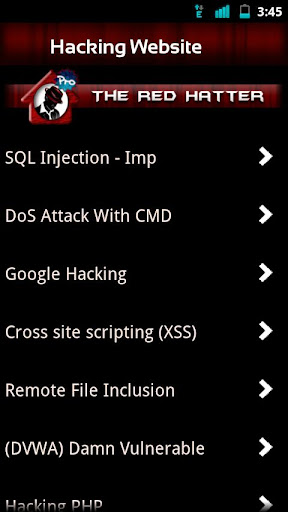
This is the Pro Version of Hackers Home which contains More Bunch of tutorials about :
Computer Hacking
WiFi Hacking
Instant Facebook Hacks Tutorial
Hacking Website
Email Hacking
Protect Yourself
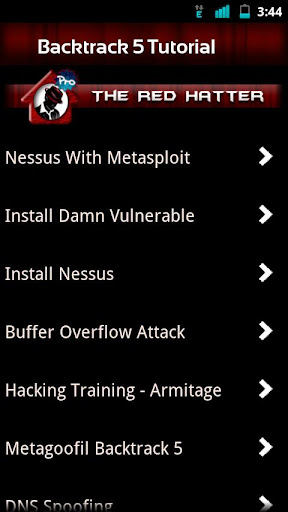
Backtrack 5 tutorials
Windows Tricks and Hacking
Regular updates
Ads Free
More Amazing Stuffs
Wanna learn to hack? Let us show you how!
Note: - This Application is only for education purpose and is 100% safe.
This application is designed by the developer for the reference only.
This App Contains Step by step 1,730 Tutorials, Some of the list are as Follows :
Protect Your own accounts from being hacked
Strong your own security
Use your android phone to gain access to facebook, youtube, twitter, amazon accounts
Hack Websites with SQL injection and other methods
Hack Gmail, Yahoo & Msn Accounts
Crack Wifi WEP and WPA passwords
Gain access to e-mail accounts
Hack Facebook accounts
Bypassing school security
Speed up your internet connection on ps3, xbox, PC, or mac
Hacking websites with SQL injection
Hacking and cracking Wi-Fi by bypassing securities
Avenger adalah salah satu game bergenre Arcade & Action yang bisa dimainkan di tablet ainol novo 7 paladin maupun di speed up ice, game ini bercerita tentang perangantara keadilandan kejahatan,setan-setanyang dikalahkanmembangun sebuahbentengmenggunakan kekuatankegelapanuntuk memperbudakmanusia,game ini sangat ringan dimainkan dan memiliki grafis yang cukup bagus, jika anda ingin memainkanya silahkan langsung download game ini di Play Store (free).


 cek isi folder untuk memeriksa kelengkapan file. Clockworkmod/backup/2012-06-21.04.07.28 ,jika file yang di extrak sudah lengkap akan terdapat file-file.sperti ini


 7.pilih opsi wipe chace patitions pilih delete all data.


 8. pilih advance dan wipe dalvik cache

 9.pilih back up restore. Liat gambar


 10. jika semua tahapn telah selesai silahkan restar tablet, dan Enjoy.


 Then go into platform-tools directory: