Social Icons

Pages

20/06/12

Install Ubuntu on Android!


For those of you who want to install Ubuntu on your Android smartphone or tablet device, here’s our universal guide on how to do it. (This guide is based off my original guide at NexusOneHacks.net)
*Note – This guide should work on most “rooted” Android smartphones/tablets with no further modification.
We will be running Ubuntu “chrooted” under Android OS, which just means that we will be running a “virtual” Ubuntu OS that runs on top of the Android OS.  Your Android OS will work fully (e.g. your phone will keep working normally) while the Ubuntu runs on top of it.
First of all, you should have your Android device “rooted” because you need root access to run Ubuntu off your Android.
Second, your Android OS must support loop devices.  Most newer Android smartphones/tablets come with this support so we can mount our Ubuntu image as a loop device.  If not, you will either have to build your own kernel with support for loop devices or you can try an aftermarket ROM for your phone as most aftermarket ROMs come with support for it.
For example, G2 Phone and Nexus One both come with loop device support so there’s no need for us to compile a new kernel for it but for others, you may have to.
How do you know this?  Just try installing Ubuntu and if it doesn’t boot, your Android device needs a kernel with loop device support.  Otherwise you are fine.

How to Install Ubuntu on Android! (Windows)

First, download the following Ubuntu.zip file (from a preferred mirror), unzip and copy over the whole ubuntu directory to the SD card of your Android smartphone/tablet device:


Download ubuntu.zip


(Turn USB storage ON then copy over the Ubuntu folder to the root directory of your SD card.)

(What it looks like after copied over to the SD Card)
1) Again, make sure you have your Android smartphone/tablet “rooted”!
2) You must have Android SDK installed or have access to adb.exe.
3) Make sure your Android phone/tablet is in debugging mode.   Go to Settings->Applications->Development and make sure USB Debugging is checked ON.

4) Connect your Android device to your computer via USB cable and set the USB mode to “Just Charge”.
5) Your Android device should be recognized as “ADB Device” under Device Manager.  If not, install appropriate drivers.
For all HTC Android smartphones/tablets (such as G2 Phone, Nexus One), you can download Windows drivers here:

HTC Windows 64-bit driver download – Click Here to Download Driver
HTC Windows 32-bit driver download – Click Here to Download Driver
6) Open up a command prompt by typing “cmd” under Start->Search programs and files.
7) Browse to your SDK directory where you installed the Android SDK:

8) Then go into platform-tools directory:

9) Type “adb devices” to double-check your Android device is recognized.

In this example, I used an HTC G2 Phone, which shows up at “HT09SR204261″.  This is fine.  However, if you get an empty device, that means you didn’t install the drivers for your phone/tablet correctly. (Go back to #5)
10) Type “adb shell” to enter the Android shell.

Then type “su” to enter super user mode, then type “cd /sdcard” and “cd ubuntu” to enter the ubuntu directory in your SD card of your Android device.
11) Next, type “sh ubuntu.sh” to run the script which will basically get your Ubuntu image ready to run on your Android smartphone/tablet.

If you get error messages, don’t worry and keep going.
12) Type “bootubuntu” to enter Ubuntu.  (Next time you enter Ubuntu, you just need to type “bootubuntu” from your /sdcard/ubuntu directory, no need to run ubuntu.sh again.

If you got “root@localhost” at this point, congratulations!  This means your Android OS comes with loop device support and Ubuntu is now running “chrooted” on top of your Android OS!!!
However, if you failed at this point, your Android OS probably doesn’t support loop devices, try installing another ROM or compiling your own kernel with loop device support.

How to Install Programs on your Ubuntu!

Once you’ve got Ubuntu running on your Android device, it’s time to install some Ubuntu packages(or programs).
Type “apt-get update” to update, this is the first thing you will need to do before installing any new programs.

How to Install OpenSSH-server on your Android Ubuntu!

Type “apt-get install openssh-server” to install OpenSSH-server.  What is OpenSSH-server?  If you want to connect to your Android Ubuntu via an IP address (and SSH into it), you will want to do this.

How to Install TightVNCServer on your Android Ubuntu!

If you want to access the GUI of your Android Ubuntu, you can install TightVNCServer, which allows you to access the Android Ubuntu via Android VNC app on your Android smartphone/tablet or even access it remotely from your desktop computer.
Type “apt-get install tightvncserver” to install.

How to Fix Language Issues

Above is after I connected to my Android Ubuntu via SSH2.  Well, for some reason my default language switched to German.  To fix that, just type “export LANG=en_US.UTF-8″:

How to Install LXDE!(optional)

Next, we will install LXDE (Lightweight X11 Desktop Environment).  Although we can use Ubuntu’s default GNOME (and trust me I love that), LXDE takes up less memory so our GUI access will be faster.
If you like GNOME, you can skip this step though.
Type “apt-get install lxde”

Next, let’s setup xstartup file so that when TightVNCServer is started, the LXDE runs instead of GNOME:
Type “cat > /root/.vnc/xstartup”
Then type:
cat > /root/.vnc/xstartup
#!/bin/sh
xrdb $HOME/.Xresources
xsetroot -solid grey
icewm &
lxsession

Then hit Ctrl+D twice and enter to save the file.

How to Start TightVNCServer!

Next, let’s start the TightVNCServer and connect to it from our Android phone and my Windows 7 desktop:
Type “export USER=root” and “vncserver -geometry 1024×800″.
Here, you can change the resolution settings 1024×800 to the resolution of your liking.

Now your TightVNCServer is ready to accept any incoming connections from your phone or computer.  Just point to the correct IP address and use port number 5901 to connect.
On your Android smartphone, just download the free app “Android-VNC-Viewer” and set the IP address to “127.0.0.1″ and port number 5901 to connect.

And you should be able to get into your Ubuntu like this:

You can also use desktop software like TightVNC Viewer and connect to your phone.
Do “ifconfig” to find out what your IP address is in your Android Ubuntu.
In this example, mine was connected to “192.168.1.131″.
Then connect to “192.168.1.131:5901″ on your TightVNC Viewer:

Here’s LXDE running on my desktop off my G2 Phone’s Ubuntu:

Troubleshooting

Ubuntu not running?
Try typing “cp” under Android shell and if you get an error message, it means you need to install Busybox. Install Busybox and try again.
Getting Following errors?
Err http://ports.ubuntu.com karmic/main Packages
404 Not Found
Err http://ports.ubuntu.com karmic/universe Packages
404 Not Found
W: Failed to fetch http://ports.ubuntu.com/ubuntu-ports/dists/karmic/main/binary
-armel/Packages.gz 404 Not Found

W: Failed to fetch http://ports.ubuntu.com/ubuntu-ports/dists/karmic/universe/bi
nary-armel/Packages.gz 404 Not Found
E: Some index files failed to download, they have been ignored, or old ones used
instead.
Try:
cat > /etc/apt/sources.list
deb http://old-releases.ubuntu.com/ubuntu/ karmic main universe
Then hit Ctrl+D twice and Enter.
This will update the Ubuntu sources.

Final Thoughts

As said in the video, there will be a lot of improvements in the speed of Android devices in the near future.  This year, there will be a slew of dual-core 1Ghz processor-equipped Android devices being introduced.  Which just means our Android Ubuntu will run faster and faster.

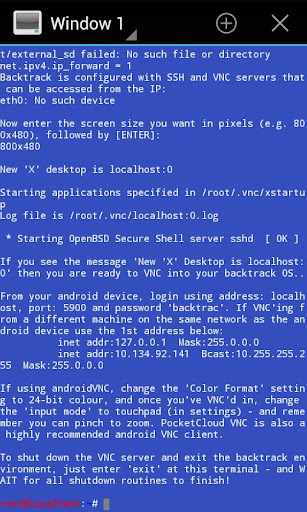
Install backtrack on Android


This is the paid version for the FREE Guide to downloading and installing Backtrack!


Backtrack Installer Paid v2.2 play.google.com.backtrackinstallguide
!!ROOT + Kernel with Loop device support REQUIRED!!

This is the paid version for the FREE Guide to downloading and installing Backtrack within Android. It is recommended that you try the free version first to make sure this method works on your device!

By Buying this version you get
  • All updates before free version 
  • Download images from my fast FTP server (direct download) instead of sourceforge (downloads will be up to around x10 faster, and when you click the button in app it will start downloading instead of opening sourceforge site)
  • New ‘one click boot feature’ which allows you to press a button in the app to boot Backtrack, or use the included widget to launch Backtrack instead of having to type out commands!
  • A good feeling of supporting the development of this app
  • +Much more in the future
!NOTE!
To use the one click boot you MUST have the terminal app used in the install guide installed on your device. That is this app here: https://market.android.com/details?id=jackpal.androidterm
If the app was included in your ROM uninstalled it then reinstall it on the market, if its included in the ROM IT WILL NOT WORK.

This app includes everything you need to install Backtrack within android and get it running on your device!
(This does not replace android on your device it just runs Backtrack ontop of android)

Requires:
  • Root
  • 1GHZ processor (recommended)
  • 512MB Ram (recommended)
  • Android 1.6 or higher
  • Kernel will loop device support (this is included in most custom ROM's)
  • SD card with at least 3.5GB of free space
  • Data connection on your device
What is this?
This is a customized Backtrack image optimized for the ARM processor (the processor android runs on). This will allow you to run a full Backtrack system within android (You can still make calls, text, and use android without having to reboot your phone!).

Key Features:
  • User select screen size on boot
  • All the security testing software included in backtrack
  • All other software included in backtrack
  • Updated to newest software updates as of 1/1/12
  • Image cleaned up to give around 800MB free space 
  • Download images from my fast FTP server!
  • One click boot feature which allows you to press a button in the app to boot Backtrack or use the included widget to launch Backtrack instead of having to typing commands
App provides a detailed instruction set on how to get Backtrack running on your android device with all of the necessary files and custom backtrack images. The images are 700MB to download and 3.5GB once extracted

For more information about backtrack please visit: http://www.backtrack-linux.org/
If you are not sure you device will work please try the free Ubuntu version, or check out the list of working devices ROM/kernels here: http://linuxonandroid.blogspot.com/p/working-devices.html

What's in this version : (Updated : Apr 21, 2012)
  • One click boot widget and buttons fixed, however you MUST UPGRADE TERMINAL APP to newest version in order to work
Required Android O/S : 2.2+

Screenshots :
 

Download : 200Kb APK 

source : apkmania

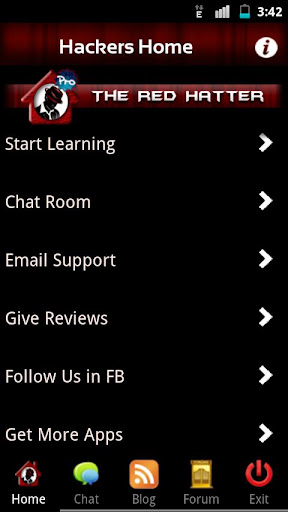
Hackers Home Pro v1.04 APK


Hacker's Home :- ★ A Complete Hacker's Handbook ★


Hackers Home Pro v1.04 play.google.com.theredhatterhackershomepaid
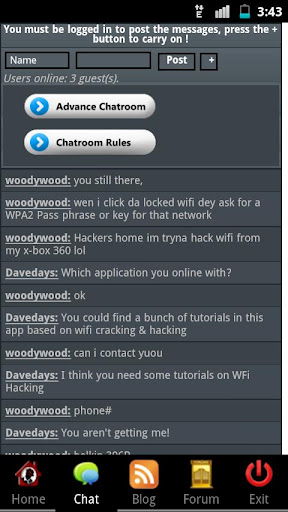
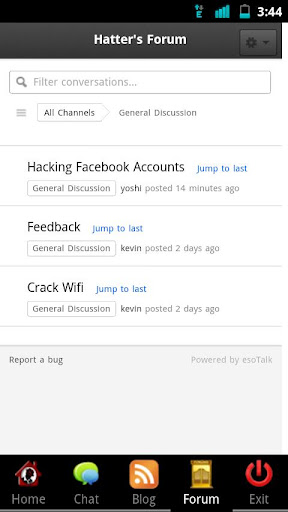
Hacker’s Home is the 1st android app ever in the Google Play Store which includes tons of stuffs relating Hacking Computer, Wi-Fi, Website, Facebook, Emails with step by step tutorials and with live chat functionality which let you stay tuned with the hackers all around the globe.
This is the Pro Version of Hackers Home which contains More Bunch of tutorials about : 
  • Computer Hacking
  • WiFi Hacking
  • Instant Facebook Hacks Tutorial
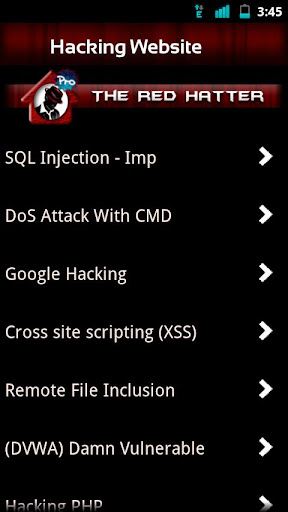
  • Hacking Website
  • Email Hacking
  • Protect Yourself
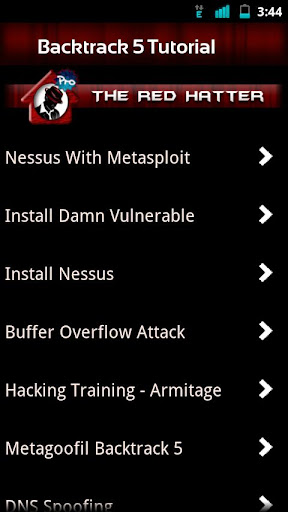
  • Backtrack 5 tutorials
  • Windows Tricks and Hacking
  • Regular updates 
  • Ads Free
  • More Amazing Stuffs
Wanna learn to hack? Let us show you how!

Note: - This Application is only for education purpose and is 100% safe. This application is designed by the developer for the reference only.

This App Contains Step by step 1,730 Tutorials, Some of the list are as Follows :
  • Protect Your own accounts from being hacked
  • Strong your own security
  • Use your android phone to gain access to facebook, youtube, twitter, amazon accounts
  • Hack Websites with SQL injection and other methods
  • Hack Gmail, Yahoo & Msn Accounts
  • Crack Wifi WEP and WPA passwords
  • Gain access to e-mail accounts
  • Hack Facebook accounts
  • Bypassing school security
  • Speed up your internet connection on ps3, xbox, PC, or mac
  • Hacking websites with SQL injection
  • Hacking and cracking Wi-Fi by bypassing securities
  • Speed up your internet and optimize your PC
  • Setup Backtrack 
  • Backtrack 5 Tutorials
  • Some Interesting Windows Tricks
  • Password Cracking Tutorials
  • How to create Viruses
  • Video Tutorials
  • + Many More
What's in this version: (Updated Jun 13, 2012)
  • Added Extra Security to avoid spammers
  • Added More Tutorials On Facebook Hacks
  • Minor Bug Fixing
Required Android O/S : 2.2+

Screenshots :


Download : 750Kb APK

18/06/12

Avenger game For ainol novo 7 paladin dan speed up ice

Avenger adalah salah satu game bergenre Arcade & Action yang bisa dimainkan di tablet ainol novo 7 paladin maupun di speed up ice, game ini bercerita tentang perang antara keadilan dan kejahatan, setan-setan yang dikalahkan membangun sebuah benteng menggunakan kekuatan kegelapan untuk memperbudak manusia,game ini sangat ringan dimainkan dan memiliki grafis yang cukup bagus, jika anda ingin memainkanya silahkan langsung download game ini di Play Store (free). 

Review game :

 Video :
Selamat mencoba


14/06/12

Setting wallpaper di android "Ainol novo 7 Paladin"

Bagi pengguna HH android, khusunya tablet ainol paladin dan speed up, mungkin akan dihadapi satu masalah jika ingin menggunakan foto Favorit untuk dijadikan wallpaper, terkadang foto yang mau di gunakan untuk wallpaper biasanya ada kendala foto yg mau dipasang pasti ga bakal full, paling cuma tengahnya aja alias ada beberapa bagian yang pastinya ga kebawa, hasilnya gambar yang di bikin wallpaper td nge zoom (ga bisa full picture kepake).
Terus bagaimana caranya pasnag wallpaper yang pas dengan ukuran asli dari Picture nya???
Solusinya adlah dengan memasang aplikasi yang bernama Pov wallpaper, aplikasi ini termasuk apliaksi Live wallpaper, cara penggunaanya gw rasa sangat mudah, cuma kekurangnya adalah battrey akan terasa cepat habis, mungkin karena POV wallpaper ini ter masuk kedalam livewallpaper, tapi jika agan2 tidak mempermaslahkan boros battre dan pengen menggunakan foto Favorit untuk wallpapaer ikuti langkah- langkah berikut ini.

1. download POV LWP
2. Copi ke sdcard lalu instal.
3. toush layar tablet anda sampe keluar setingan wallpaper lalu pilih live wallpaper

4. setelah kebuka live wallpaper cari pov wallpaper
5.Pilih "Choise images" disini nanti keluar semua Picture yang ada di tablet tinggal pilih deh,,,, di sarankan ukuran picture sudah di rubaha ke ukuran 800x480 klo ga di ubah juga tidak apa2
6. stelah memilih picture yang akan di gunakan, tahap selanjutnya adalah seting wallpaper. tanpa di seting gambar bisa goyang - goyang.
step - step nya
-Masuk ke distrot metode lalu pilih Scale.
-Cek list Invert X
-Atur X Scale dan jadikan 0
-Cek list Invert Y
-Atur Y Scale dan jasikan 0
-tekan tombol back/touch back
jika semua proses selesai anda bisa melihat picture yang di pilih tadi. jika sudah yakin dengan picture yang dipilih tingga touch Set Wallpaper.

 Dan hasil nya akan seperti ini.
 Sebagai bahan  Perbandingan menggunakan settingan wallpaper bawaan lihat di bawah ini


Selamat mencoba.


Spare Parts ainol novo 7 paladin


Mungkin sebagian pengguna tablet Ainol paladin bingung mencari spare part, dari tabeltnya, dikarena belum adanya service center resmi di indonesia dan kalau bener mau pun harus pesen langsung ke china, berbeda dengan speed up ice yang sudah ada services center resminya, tapi apa mungkin services center speed up mau menerima servicesan dari tablet ainol paladin???  hemmm,rasanya tidak mungkin. setealh pencarian di si mbah GOOGLE, akhrnya gw nemuin satu situs jual beli online di Indonesia yang menjual sparpart asli dari tablet ainol novo 7 paladin, baik itu LCD, Battrey, Motherboard , dan chasing, walapun harga yang di tawarkan cukup merogoh kantong lebih dalam, tapi lumayan tablet kesayangan bisa kembali normal .

List hardware bisa diihat di bawah ini
Original Mainboard Ainol Paladin


 Original Part LCD Screen Ainol Paladin 


 Original Baterai Ainol Paladin - Silver
 Original Full Case Ainol Paladin - White

Jika ada yang berminat silahkan berkunjung ke Jaknot. gw bukan promosi tokonya cuma sekedar berbagi informasi buat para pengguna Ainol novo 7 paladin di indonesia.
 
Blogger Templates